The Roof Replacement Process Explained
Replacing your roof in its entirety can be a daunting prospect. Whether out of necessity or as a preventative measure, proper roof replacement requires a knowledgeable contractor and appropriate materials. Fortunately, better understanding of the process can help you feel like you’re in the driver’s seat of this home improvement, even when you turn the job over to our professionals at Maxwell Building Services.
Step 1: Prepare Home for Roof Replacement
You must first clear the path for our roofers to access your house and all necessary materials without impediment. Move any vehicles out of the driveway so the workers can get as close as possible to the home without blocking in you or other family members. Make sure to remove obstructive items, such as plant pots or decorations, and keep pets inside until the job is complete. After you’ve prepared your home, it’s time to have the new roofing materials delivered. It’s important to note that you should not get these materials in advance, as they can be damaging to lawns or damaged by the elements.
Step 2: Remove Existing Roofing Materials
Once it’s time to start working, our contractors must first remove your old roof. We’ll spread a tarp out over the rest of your home, your lawn, and any other valuable items in the area, as well as set aside an area to leave old shingles and materials. After protective measures have been taken, workers extract one shingle at a time until an entire section is free of the old roof. At this point, we can begin installing the new roof to minimize the amount of time the house is exposed to the elements with no roof to protect it.
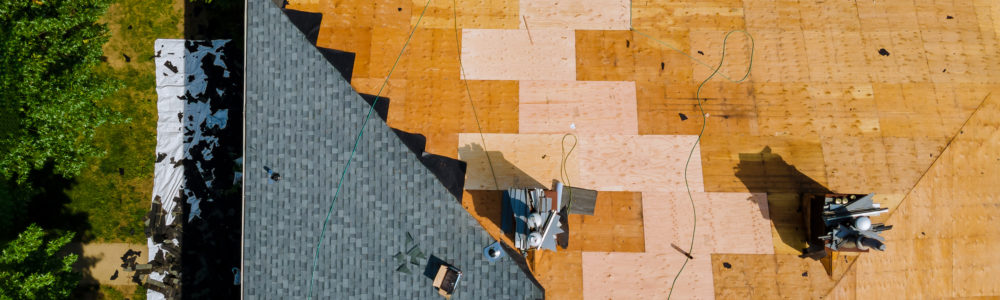
Step 3: Inspect Wood Decking
During the transition from old shingles to new ones, we inspect the wood decking under the old roof. Because the wood decking acts as the foundation on which shingles are placed, the wood itself must be in good condition to ensure proper installation. If any of the sheathing is damaged, our roofers must replace the wooden slats before they are able to proceed. Otherwise, your new roof will be unable to provide the quality of protection necessary for your home.
Step 4: Install Underlayment
Once our workers have verified that your wood decking is in condition, we can proceed to the installation of the underlayment. This helps protect the decking by acting as a barrier between the decking and the new roofing materials. In addition to the underlayment, the roofers can install a drip edge. Placed along the edges of the room, this metal barrier keeps moisture off the new wood decking to preserve it for as long as possible.
Step 5: Install New Roofing Materials
As soon as we’ve verified the condition of the wood decking, our workers can begin installing the new roof. The time it takes to complete this process varies dramatically based on the material used for the roof. Slate, for example, is more easily damaged than some other options, so workers must place it more carefully.
Step 6: Clean Up and Complete Final Inspection
The final step in the roof repair process is to clean up the work area. The roofers blow off the roof to remove debris and clear out gutters or drainage pipes. Then, our project manager inspects the work with you to ensure the quality of the work is to our satisfaction and yours.
The Bottom Line
We know how hard it is to find a trustworthy contractor, but here at Maxwell Building Services, we’ll make sure you understand every step of roof replacement so you can feel comfortable with the quality of our work. Our knowledgeable contractors can help you avoid snags and setbacks in the roof repair process to get your house back to normal as quickly as possible.